I finished a fun project last week, while Dallas was snowed and iced in!

This takes right at an hour to make. So, pretty quick and easy! My kind of project.
Supplies:
White yarn
Silver Yarn
Scissors
"Snow" accessories (to glue on)
Glue Gun
How To:
First up, this is the yarn I used. Both are from Wal-Mart

I love the silvery sparkles!

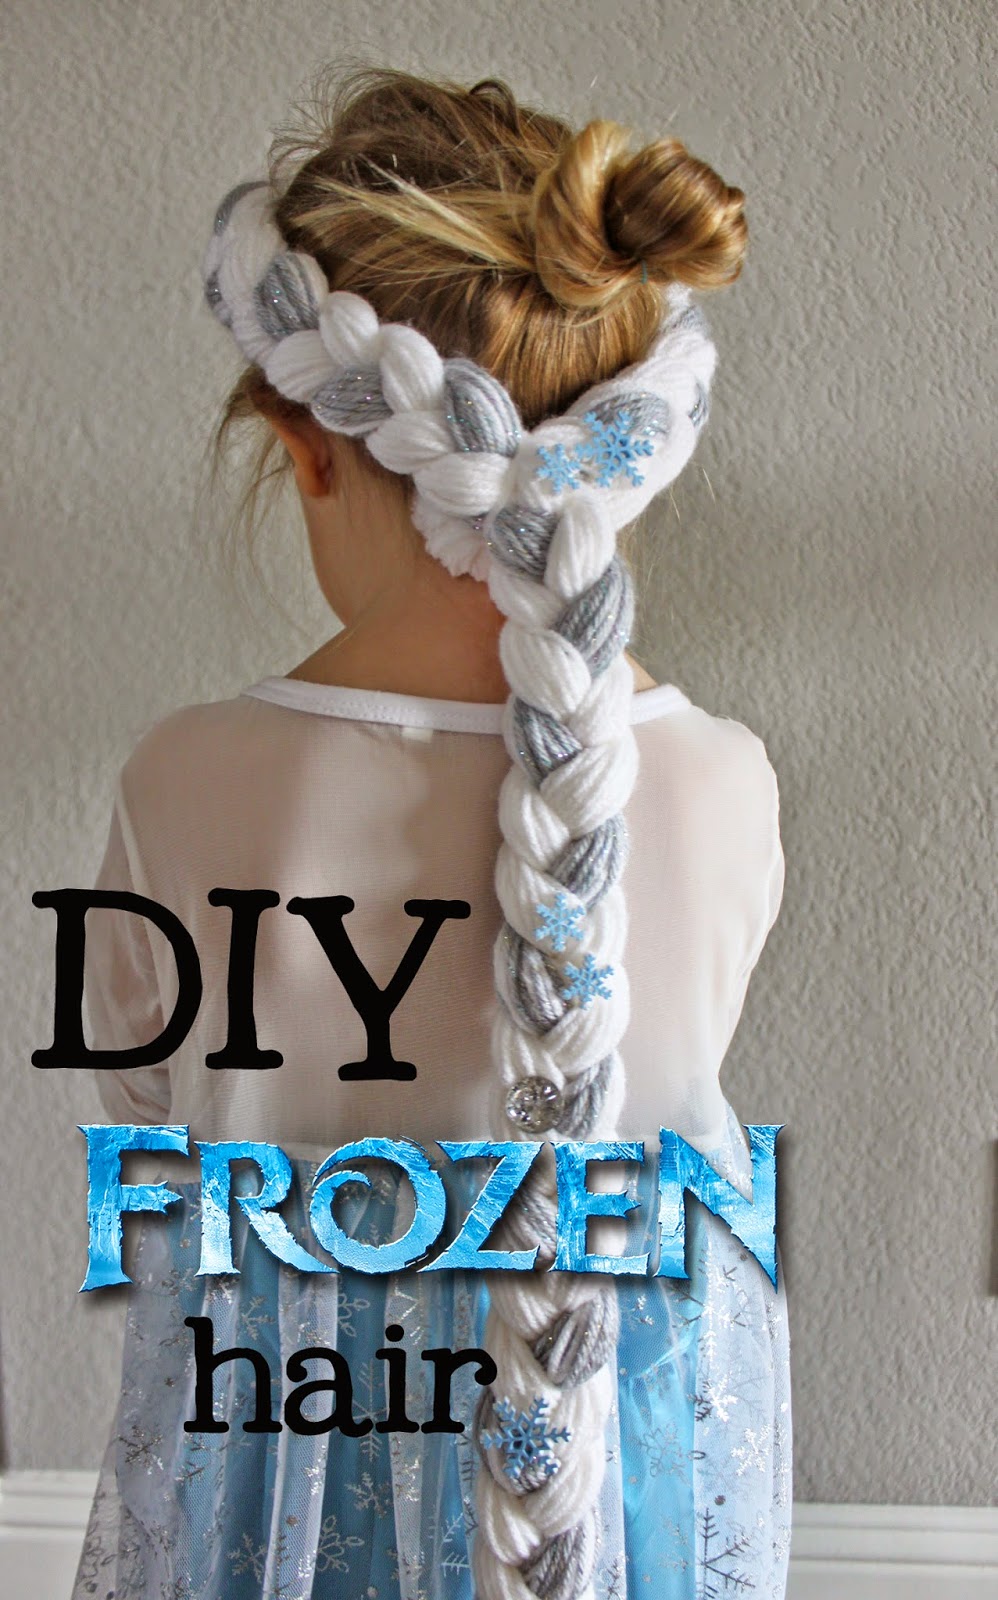
Then, decide on a length. I know Elsa's hair isn't super long, but little Miss E wanted looooong Elsa hair. So, mine is pretty long. About 40 inches. If you want to make it look more like the movie, just make it (quite a bit) shorter.
Start cutting that yarn!

Here is how I cut mine....

My oldest would pull the string, and I would cut it. I cut up the ENTIRE spool of yarn. I wanted my braid to be nice and thick.
And keep cutting....

Repeat the same process for the silver yarn.
Now you are ready to braid. Simply divide your yarn into three sections, and tie it together with a piece of string.

Start braiding!

To finish off the braid, just tie it all together with a string, like you did at the top.

To make it a "crown" that will sit on their head, simply wrap it around your little one's head to get an idea of where to glue it together. I wanted mine a little snug. The yard will stretch a little with wear, so make it a little snugger than you think.

Glue the end of your braid to spot you just measured/marked.

Then, to make it extra secure, wrap string around the part where the braid connects to the "crown" several times, and tie it off. This will keep it from coming undone!

Next up, glue on any snowflakes or sparkles you have. I found both mine in the button section at Wal-Mart.

Done!


Seriously so cute, right?!